scrapbooking

SOME SCRAPPING!!!

I realised I had a few scrap pages that I hadn’t shown you.  So in between projects I thought I would pop some of these on.  These pages are ones I have done at workshops over the last few months (or more!).  I am not a scrapper and I have a lot to learn.  So, they are very simple pages but show how Stampin’ Up! products can be used on your pages.  I won’t go into detail with all these pages.

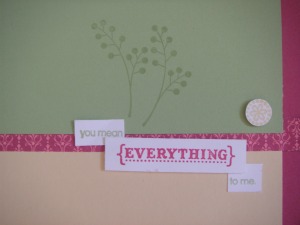
This one is going back a while ago.  This is a 12×12 page using ‘Always’.

It is a bit hard to see so here is a close up.

This is another old one  using ‘Great Friend’.  (Had to throw that one in Lynda! – It’s been a while since I have used this set).

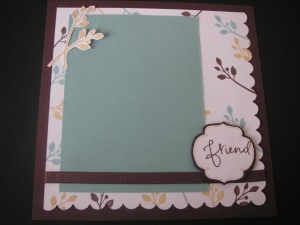
This is a 6″x6″ page. It’s a bit hard to see but the base is Chocolate Chip.  I just realised this has lost it’s butterfly.  Mmmm, do I dust that set off to stamp another one?????

I have a few more pages to show you but  that will be for another day.  I must run now.  I have new toys to play with!!!!!  Oh, What fun! 

Happy Stamping 🙂

scrapbooking, Uncategorized

“YOU SPIN ME RIGHT ROUND..”

It has been a while since I showed any scrapbooking.  Actually it has been a while since I have done any complete pages!  I have just been doing some small 6×6 for workshops.  I recently joined Soul Scrappers to work on my scrapbooking.    This weeks challenge was creating a project using circles.  I got a circle Scissors for Christmas and although I had a play with it at Christmas it kind of got packed away.  So – I thought this would be a great opportunity to work with it.  I thought these photos would really suit this theme.

This is of my daughter playing on this incredible spinning swing at the playground at Homebush, Sydney.  She had a great time spinning on it. I cut a circle with the Circle scissors from Pink Passion cardstock, firstly cutting the inner circle and then the outer circle.  I cut the circle in half and layered it under the mats with the photos.  To create the title I stamped the words SPIN with the Schoolbook Serif Alphabet.  I cut them out and then covered them with Crystal Effects.  Not that you can see that very well!  I punched out circles with various punch sizes from cardstock and DSP (Good Morning Sunshine).  Don’t you just love that DSP that I have layered it all on?  This is the Kaleidoscope paper from the Summer Mini.  It is so bright and funky.  I inked around the edge of the paper with the white ink pad.

There you have it.  A complete scrapbooking layout from me!  Hopefully there is more to come. 

Thanks for stopping by!

Personal Ramblings, scrapbooking

CARLIE’S PAGE!

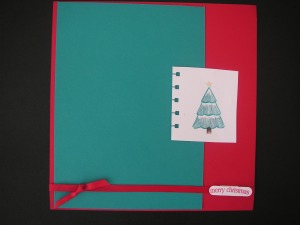
I just had to stop by today to show you this beautiful creation by my DD Carlie, who is 9 years old might I add!  She often gets in my craft room EARLY in the morning.  She brought it to me later and I was so impressed.  She did this all herself.  I did help tie the ribbon for her.  The design and the stamping was all her own ideas. 

PICT1695

She inked up the tree from Christmas Classics with the markers.  (I hadn’t even inked this set up yet!).  She used Taken with Teal, So Saffron and Chocolate Chip.  She has used the Spiral punch on the edge of the Whisper White square.  Carlie then stamped the greeting with Real Red and used the Word Window punch to punch it out and then finished it off with the Real Red Grosgrain.  She has said it is ready for me to take a photo of her by the Christmas Tree 😉 

I had to laugh though.  Later when I went into my craft room I found this piece of paper on my desk.  She had put a lot of thought into this!  She had drawn a sketch even with what colour she was going to use!  Now where does she get these ideas from!!!

PICT1696

Thanks for stopping by to see Carlie’s creation.  I’m very proud of her!!

Hope you stop by again soon!

scrapbooking

A BOY PAGE!

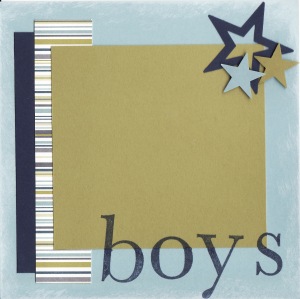
Two posts in one day!  It’s not very often that happens.  While we were on the topic of scrapbooking I thought I would show you this page.  This is a 6×6 page I have been showing at my workshops lately.  I was inspired by a cover on a scrapbooking magazine I read a while ago.  Not sure which one now!

boys

I have sponged around the edge of Baja Breeze cardstock in Whisper White ink.  I have cut a strip of paper from the SU Urban Garden DSP and adhered this onto a strip of Night of Navy card.  I added a mat of Kiwi Kiss and then punched out some stars using the small and large star punch.  I raised the small stars with dimensionals.  I used the Schoolbook Serif Alphabet stamps inked up in Night of Navy to stamp ‘boys’.  When you stamp the word  it run up on to the Kiwi Kiss mat and you get a little gap, so I filled it in with my Night of Navy marker.  It is a very simple page but I was pleased with how it turned out.  It is a quick page to show at a workshop. 

Do you need any of these supplies or any other products from Stampin’ Up!.  Let me know.  I can have them shipped anywhere in Australia.  Check out my VIS club page to see how you can benefit from purchases over $50.  Check back again soon as I will show you some other projects I have been working on.

scrapbooking

A PAGE WITH STYLE – PART 2!

Well, it’s taken me a few days to get back here.  Life is busy some times!  I have got lots to show you though.  Last post I showed you pages I created with a Heritage style and a Classic style.  The other 2 styles we looked at in my Scrapbooking 101 class were the Pop style and Shabby Chic.  Now, I have a lot to learn about scrapbooking and I have limited supplies, but these might give you some ideas.

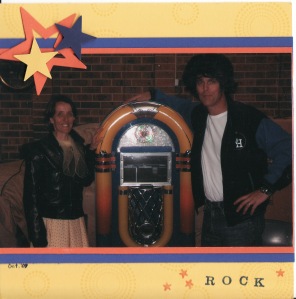
First, to the Pop Style.  Just ignore the photo won’t you!  It was taken at my DH’s 40th birthday party 2 years ago.  Yes, it was a 50’s party.  The  Pop style of scrapbooking is fun and bright, generally following the trend.  It consists of simple text and simple words, fun shapes and symbols.

rock

Cardstock: YoYo Yellow, Brilliant Blue, Only Orange.

Inks: Only Orange, Brilliant Blue markers.

Stamps: Simple Serif Mini Alphabet and Numbers.

Other: Large Star Punch, Small star punch, dimensionals


I love how the stars punch out using the small and large punch together.

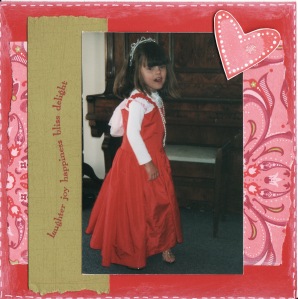
The next page is showing the Shabby Chic style.  This is of my DD taken a few years ago.  This is her favourite Dress Up Dress, and she does look gorgeous!!

Shabby Chic style of scrapbooking is typically with torn and distressed papers, lots of embellishments and usually pastel colours.   I have sponged around the edge of Real Red card with the white ink pad and then used the white gel pen to create faux stitching.  I have torn the edges of the Raspberry Tart paper and the Kiwi Kiss card strip.  You can’t see the heart too well, but I have rock and rolled the heart in regal rose and then Rose Red.  I have added some Dazzling Diamonds with the 2-way glue pen.

Carlie Shabby Chic

Card: Real Red, Kiwi Kiss, Whisper White, Raspberry Tart DSP.

Inks: Regal Rose, Rose Red, Whisper White,

Stamps: Best Wishes and More.

Other: White Gel Pen, 2-way glue pen, Dazzling Diamonds, Dimensionals.

I think this page is beautiful anyway!!!  

I have more to show you later.  Till then – Happy Stamping!!!

scrapbooking

A PAGE HAS STYLE!!!

A couple of weeks ago I ran a Scrapbooking 101 class. I talked about
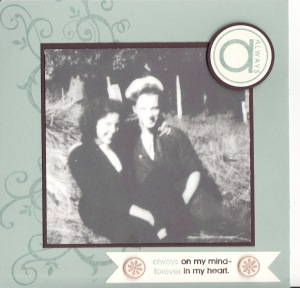
different scrapbooking styles. We looked at 4 styles: Heritage, Classic, Pop and Shabby Chic. I made a 6×6 page for each of the 4 styles. This first one shows the Heritage style. This style generally depicts historical or vintage memorabilia,and uses earthy tones.  Journalling is usually more detailed and personal.  I hadn’t put any journalling on this page because of the size of the page, but I don’t think it needs to say a lot either.
Mum and Dad H

This is my MIL and FIL taken a LITTLE while ago.  My FIL passed away 7 years ago so this is a very special photo.  I have clear embossed the ‘a’, and how can you go wrong with Baroque Motifs?  This set works really well with heritage pages.

Stamps: Baroque Motifs, Always

Inks: Sage Shadow, Choc Chip.    Markers:  Choc Chip, Creamy Caramel.

Card: Sage Shadow, Choc Chip, Very Vanilla.

Others: Clear EP, Heat Tool, Dimensionals. 1 1/4″ and 1 3/8″ circle Punch.


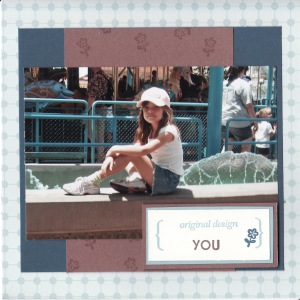
The next page shows a Classic Style.  This is typically very simple,  pages are uncluttered and generally with square or rectangular shapes.  Journalling is in a simple font and embellishments are used sparingly.
Classic Carlie

This is my DD taken at California Adventures when we went to the US last year.  I have kept it simple.  I have just realised I haven’t put dates on either of these photos, so I will have to amend that.

Stamps:  Simple Serif Mini Alphabet, Art by Design, short and Sweet.

Inks: Baja Breeze, Close to Cocoa.

Card: Urban Garden DSP, Close to Cocoa and Not Quite Navy, Whisper White, Dimensionals, 2 way glue pen, dazzling diamonds.

In the next couple of days I will show you my 2 other pages showing the other 2 styles – Pop and Shabby Chic.

I am running the Scrapbooking 101 class in June again if you missed out.  For those who came along to the first one or who would like to learn more about layouts and sketches then come along to Part 2 (see my class page for details.

Don’t forget you only have a few days left of the Designer Series Paper special.  See here for details.  Also, why don’t you get a 20% discount on all your Stampin’ Up purchases by joining Stampin’ Up!  The great offer of joining for $150 will end on the 31st May.  Email me for more details.

scrapbooking

SCRAPBOOKING 101

I have a few places left in my Scrapbooking 101 class this Friday. This is just in time with May being National Scrapbooking Month.
Would you like to learn the basics of scrapbooking or just brush up on your skills? Then if you live in the Illawarra area, come along. You need to let me know by Tuesday 12th May.
We will go through the basics of scrapbooking, looking at layout, colour, style, journalling, accents. These principles apply to cardmaking as well, so if you are a cardmaker then they would be good for you to.
Check out my Class page for more details.
Hope to see you.

scrapbooking

WISH BIG!!

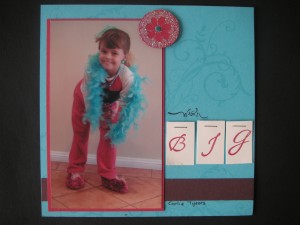
I thought I should show you some scrapbooking.  Now I’m just starting out on this scrapbooking venture and I have a lot to learn.  I liked how this page turned out though.  It is a 6″x6″ page.  This is of my DD Carlie.   This photo was taken 18 months ago when she was 7.  She loves dressing up.  Although, she told me the other day that she is getting too old to dress up!  We even packed up her baby doll clothes and her dress up clothes.  It was a very sad day (for me anyway!!)

pict1145

I picked out the colours in the photo to use.  The base is Tempting Turquoise.  I have matted the photo in Ruby Red and used a Chocolate Chip card strip.  I didn’t have any alphabet stamps at the time so I used the Ruby Red marker to ink up the letters from my Sincere Salutations set.  It does say BIG.  I know it is not too clear!!  The word wish is from the Short and Sweet set.  I don’t seem to make a card or anything without using this set.  Of course, I have used Baroque Motifs set as well.   The flower embellishment is from Seeing Spots.  I inked the flower in versamark and stamped it on Ruby Red cardstock.  I applied heat and stick powder, heat embossed it then added the Dazzling Diamonds.  I heated it again to let it set.  I cut the circle out.  I didn’t have any turquoise brads, so I punched a circle out with a small circle punch and adhered it to the centre.  It was very fiddly, but with some perseverance (and a little force LOL) – it stuck.  I added some crystal effects to the centre to make it shiny – and you can see that of course!  I used dimensionals to add it the page.  Page done!  I have a few other pages lined up to finish,  so I will have to get a move on.